
[Azure] Table Storage 란? Table Storage 생성 & Spring Boot 로 사용
Table Storage 란?
비관계형 구조화된 데이터(구조화된 NoSQL 데이터라고도 함)를 저장하는 서비스로, 스키마 없이 디자인된 키/특성 저장소를 제공한다.
Table Storage는 스키마가 없기 때문에 애플리케이션의 요구 사항이 변화함에 따라 데이터를 쉽게 적응시킬 수 있으며, 데이터에 대한 액세스는 많은 애플리케이션 유형에 대해 빠르고 비용 효율적이며 비슷한 양의 데이터일 때 일반적으로 전통적인 SQL에 비해 비용이 매우 낮다.
용도는 다음과 같다.
- 웹 규모 애플리케이션을 처리할 수 있는 구조화된 데이터 TB 저장
- 복합 조인, 외래 키 또는 저장 프로시저가 필요하지 않고 빠른 액세스를 위해 역정규화할 수 있는 데이터 세트 저장
- 클러스터형 인덱스를 사용하여 신속하게 데이터 쿼리
- WCF 데이터 서비스 .NET 라이브러리와 함께 OData 프로토콜 및 LINQ 쿼리를 사용하여 데이터 액세스
Storage 계정 생성
Table Storage를 생성하기 위해서는 Azure Storage 계정을 먼저 생성해야 한다.
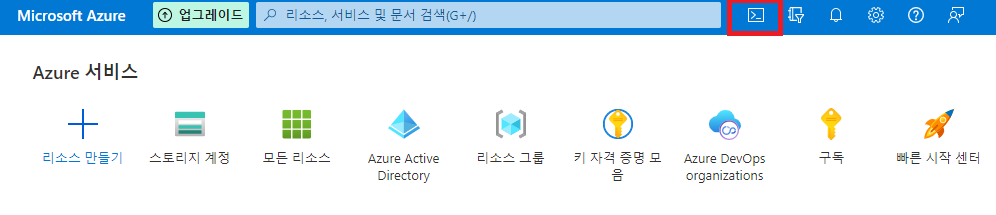
Azure Portal(https://portal.azure.com/#home) 에서 CLI를 선택한다.
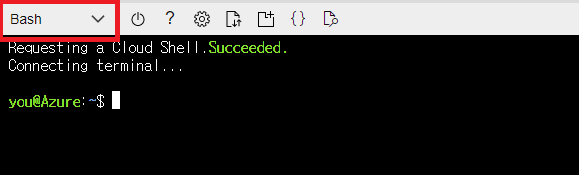
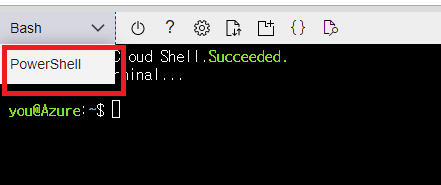
Bash 에서 PowerShell 로 변경한다.
Azure 로그인
CLI 환경에서 Azure 계정에 대한 로그인을 진행한다. (아래 명령어를 입력 후 결과에 나오는 URL과 코드값을 입력 후 로그인을 진행하면 된다)
1
Connect-AzAccount -UseDeviceAuthentication

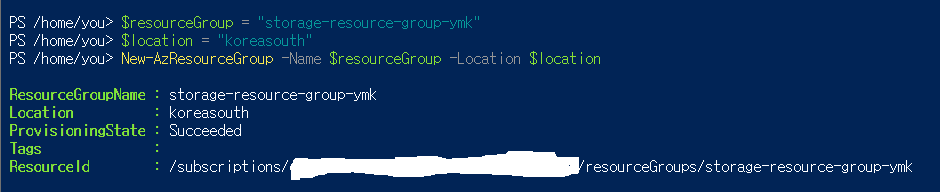
리소스 그룹 생성
storage에 사용할 리소스 그룹을 생성한다.
1
2
3
$resourceGroup = "storage-resource-group-ymk"
$location = "koreasouth"
New-AzResourceGroup -Name $resourceGroup -Location $location
만약 location 매개변수에 어떤 지역을 지정할 지 확실하지 않다면 아래 명령어를 사용해 지역 목록을 검색한다.
1
Get-AzLocation | select Location
스토리지 계정 생성
스토리지 계정을 생성한다. (스토리지 계정의 이름은 Azure 전체에서 고유해야 한다.)
1
2
3
4
5
6
7
8
9
$storageAccountName = "ymkstorage"

$storageAccount = New-AzStorageAccount -ResourceGroupName $resourceGroup `
		  -Name $storageAccountName `
		  -Location $location `
		  -SkuName Standard_LRS `
		  -Kind Storage

$ctx = $storageAccount.Context

여기까지 진행 했다면 Storage 계정 생성이 완료됐다.
모듈 설치
엔터티를 관리하기 위한 명령이 있는 AzTable 모듈을 설치
1
Install-Module AzTable

테이블 생성과 사용
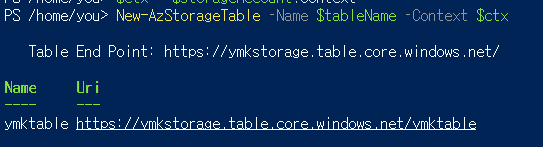
테이블 생성
1
2
$tableName = "ymktable"
New-AzStorageTable –Name $tableName –Context $ctx
데이블 데이터 명령어
테이블 작업 수행 전 CloudTable 속성에 대한 참조
1
$cloudTable = (Get-AzStorageTable –Name $tableName –Context $ctx).CloudTable
데이터 입력
(partitionKey 와 rowKey 는 필수값이며, rowKey는 중복 불가)
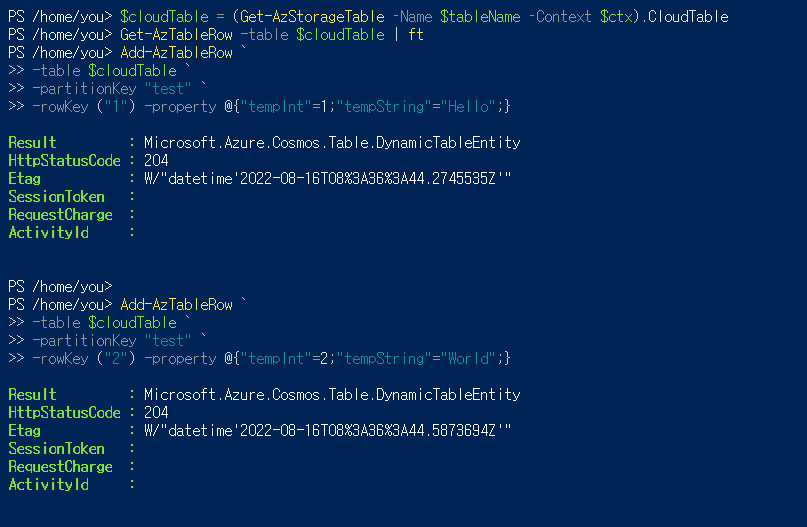
모든항목검색
1
Get-AzTableRow -table $cloudTable | ft

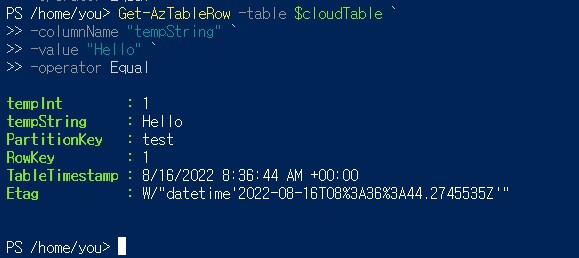
특정 열의 특정 값 검색
1
2
3
4
5
6
7
8
9
Get-AzTableRow -table $cloudTable `
	-columnName "컬럼명" `
	-value "컬럼값" `
	-operator Equal

Get-AzTableRow -table $cloudTable `
	-columnName "tempString" `
	-value "Hello" `
	-operator Equal
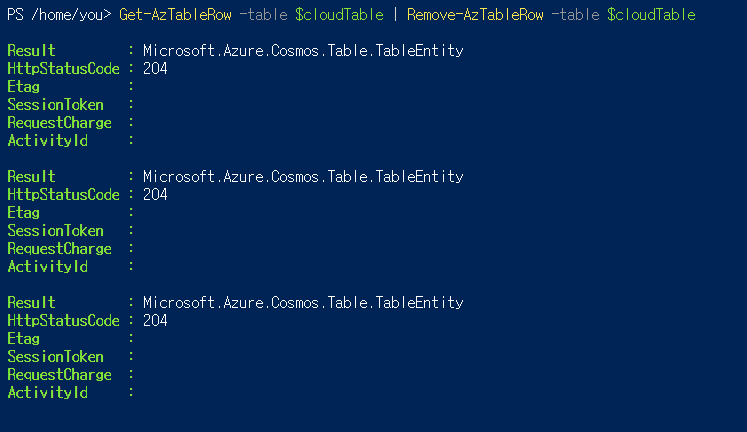
테이블 모든 데이터 삭제
1
Get-AzTableRow -table $cloudTable | Remove-AzTableRow -table $cloudTable
Spring Boot 에서 사용하기
Azure 의 Table Storage 를 Spring Boot 환경에서 사용하는 법을 알아보자
의존성 추가
Maven(메이븐) 일 경우
1
2
3
4
5
<dependency>
	<groupId>com.microsoft.azure</groupId>
	<artifactId>azure-storage</artifactId>
	<version>8.6.5</version>
</dependency>
Gradle(그레들) 일 경우
1
2
// https://mvnrepository.com/artifact/com.microsoft.azure/azure-storage
implementation 'com.microsoft.azure:azure-storage:8.6.5'
스토리지 정보 확인
스토리지 계정에 접근하기 위한 연결 문자열을 확인하자
Azure Portal(https://portal.azure.com/#home) 에서
스토리지를 검색한다.
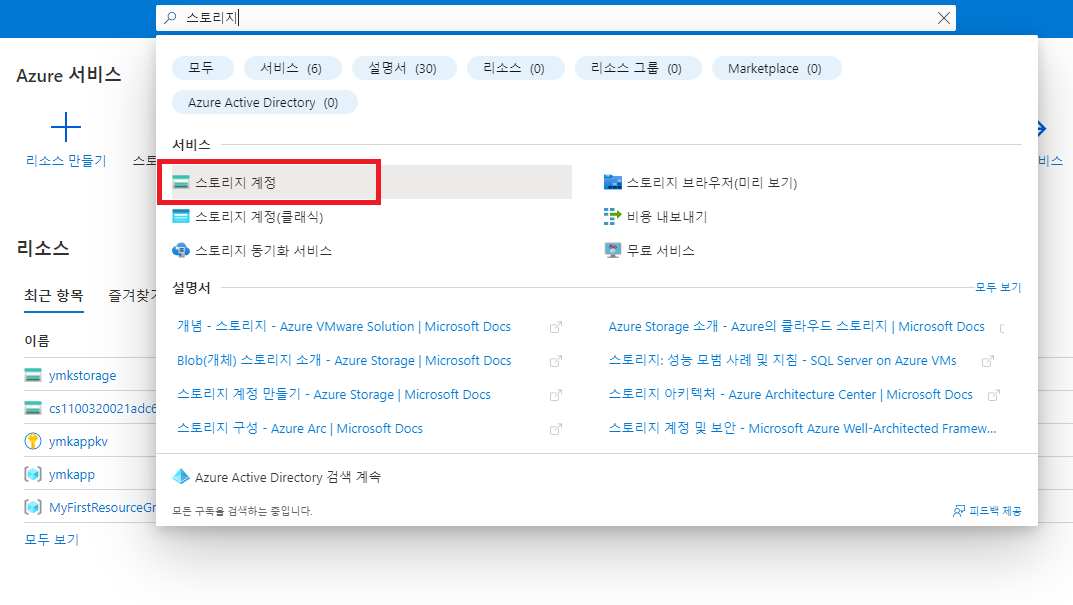
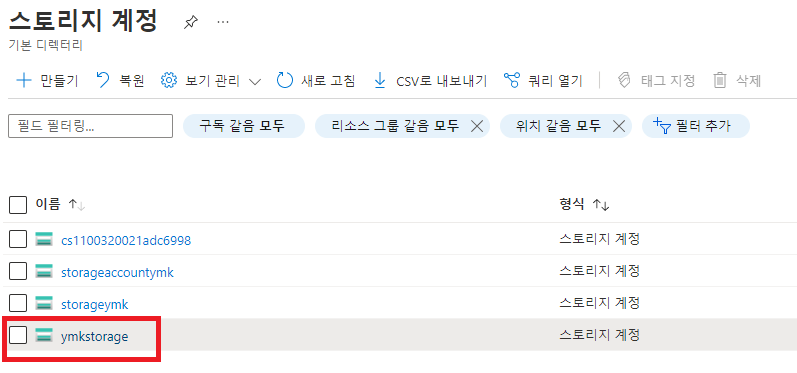
내가 접근 할 스토리지 계정을 선택한다.
사이드 메뉴에서
액세스 키를 선택한다.
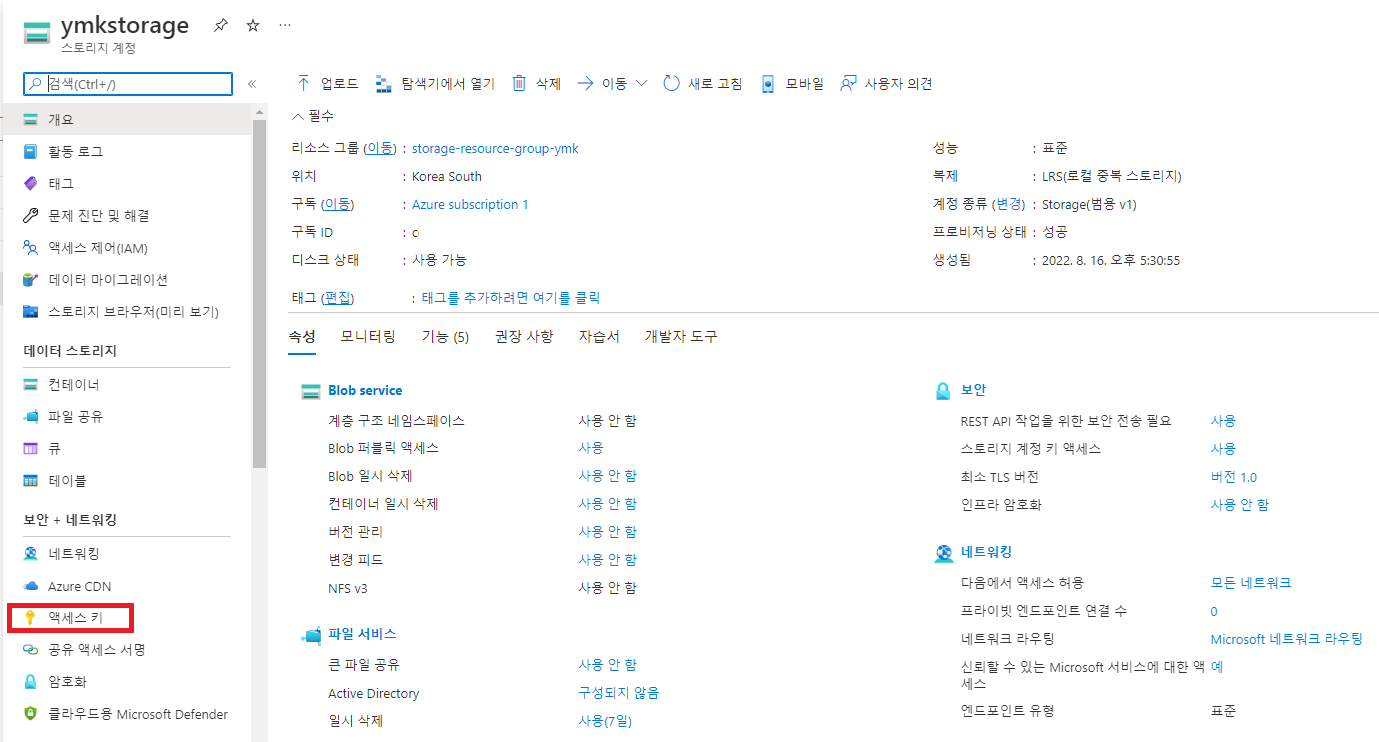
사이드 메뉴에서
연결문자열을 확인한다.

엔티티 생성
데이터 조회, 입력에 사용 할 Entity를 생성한다.
1
2
3
4
5
6
7
8
9
10
11
12
13
14
15
16
17
18
19
20
import com.microsoft.azure.storage.table.TableServiceEntity;

import lombok.Getter;
import lombok.NoArgsConstructor;
import lombok.Setter;

@Getter
@Setter
@NoArgsConstructor
public class AzureSampleEntity extends TableServiceEntity{

	String tempId;
	String tempName;

	public AzureSampleEntity(String lastName, String firstName) {
		this.partitionKey = lastName;
		this.rowKey = firstName;
	}

}
연결 문자열 설정
스토리지 계정 접근을 위해 연결 문자열을 코드내에 설정한다.
1
2
3
4
public static final String storageConnectionString = "DefaultEndpointsProtocol=https;"
			+ "AccountName=YOUT_STORAGE_ACCOUNT_NAME;"
			+ "AccountKey=YOUR_ACOUNT_KEY;"
			+ "EndpointSuffix=core.windows.net";
테이블 생성
1
2
3
4
5
6
7
8
9
10
11
12
13
14
15
16
public void createTable(String tableName) {
	try {
		// 연결 문자열에서 스토리지 계정을 검색
		CloudStorageAccount storageAccount = CloudStorageAccount.parse(storageConnectionString);

		// 테이블 클라이언트를 생성
		CloudTableClient tableClient = storageAccount.createCloudTableClient();

		// 테이블이 없는 경우 생성
		CloudTable cloudTable = tableClient.getTableReference(tableName);
		cloudTable.createIfNotExists();
	} catch (Exception e) {
		// Output the stack trace.
		e.printStackTrace();
	}
}
스토리지 계정의 모든 테이블 조회
1
2
3
4
5
6
7
8
9
10
11
12
13
14
15
16
17
18
public void selectTableList() {
	try {
		// 연결 문자열에서 스토리지 계정을 검색합니다.
		CloudStorageAccount storageAccount =
			CloudStorageAccount.parse(storageConnectionString);

		// 테이블 클라이언트를 생성
		CloudTableClient tableClient = storageAccount.createCloudTableClient();

		// 테이블 만큼 반복
		for (String table : tableClient.listTables()) {
			System.out.println(table);
		}
	} catch (Exception e) {
		// Output the stack trace.
		e.printStackTrace();
	}
}
데이터 입력
1
2
3
4
5
6
7
8
9
10
11
12
13
14
15
16
17
18
19
20
21
22
23
24
public void insertData(String tableName, String partitionKey, String rowKey) {
	try {
		// 연결 문자열에서 스토리지 계정을 검색합니다.
	    CloudStorageAccount storageAccount = CloudStorageAccount.parse(storageConnectionString);
	    // 테이블 클라이언트를 생성
	    CloudTableClient tableClient = storageAccount.createCloudTableClient();
	    // 배치 작업을 정의
	    TableBatchOperation batchOperation = new TableBatchOperation();
	    // 테이블에 대한 클라우드 테이블 개체를 생성
	    CloudTable cloudTable = tableClient.getTableReference(tableName);

	    // 테이블에 추가할 엔티티를 생성
	    AzureSampleEntity sampleEntity = new AzureSampleEntity(partitionKey, rowKey);
	    sampleEntity.setTempId("azuretest-temp-id-1");
	    sampleEntity.setTempName("azuretest-temp-name-1");
	    batchOperation.insertOrReplace(sampleEntity);

	    // 테이블에서 작업 배치를 실행
	    cloudTable.execute(batchOperation);
	} catch (Exception e) {
		// Output the stack trace.
		e.printStackTrace();
	}
}
특정 데이터 조회
1
2
3
4
5
6
7
8
9
10
11
12
13
14
15
16
17
18
19
20
21
22
23
24
25
26
27
28
29
30
31
32
33
34
35
public void selectOne(String tableName, String partitionKey, String rowKey) {
	try {
		// Retrieve storage account from connection-string.
		CloudStorageAccount storageAccount =
			CloudStorageAccount.parse(storageConnectionString);

		// Create the table client.
		CloudTableClient tableClient = storageAccount.createCloudTableClient();

		// Create a cloud table object for the table.
		CloudTable cloudTable = tableClient.getTableReference(tableName);

		// Retrieve the entity with partition key of "Smith" and row key of "Jeff"
		TableOperation tableOperation =
			TableOperation.retrieve(partitionKey, rowKey, AzureSampleEntity.class);

		// Submit the operation to the table service and get the specific entity.
		AzureSampleEntity specificEntity =
			cloudTable.execute(tableOperation).getResultAsType();

		System.out.println("specificEntity : "+specificEntity);

		// Output the entity.
		if (specificEntity != null)
		{
			System.out.println(specificEntity.getPartitionKey() +
				" " + specificEntity.getRowKey() +
				"\t" + specificEntity.getTempId() +
				"\t" + specificEntity.getTempName());
		}
	} catch (Exception e) {
		// Output the stack trace.
		e.printStackTrace();
	}
}
테스트 및 확인
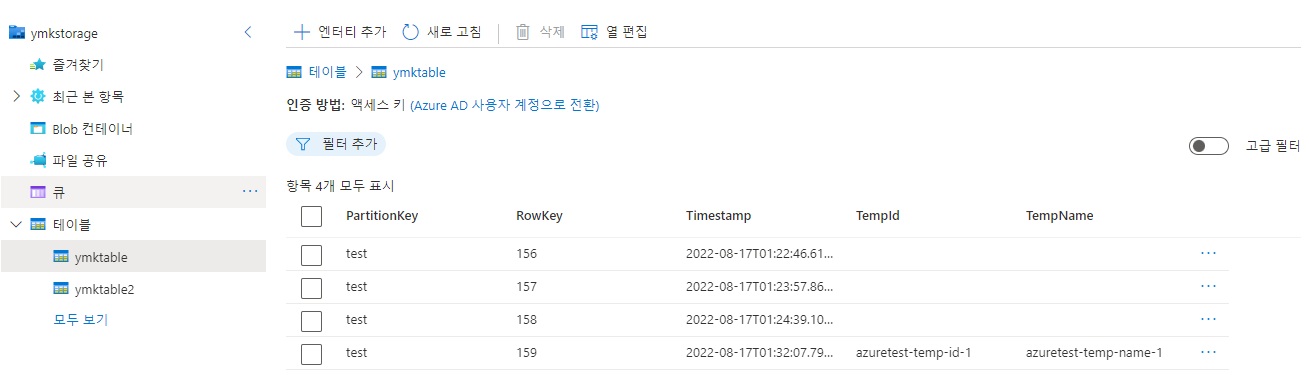
위 코드를 실행 후 Azure Portal 에서 작동여부를 확인해보자
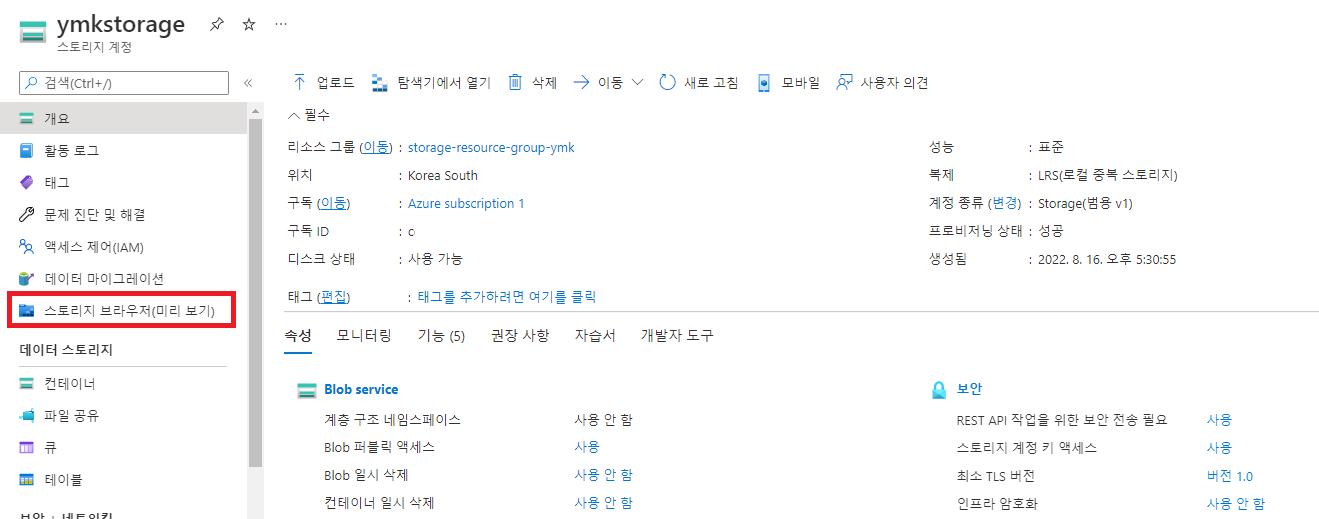
스토리지 계정에서
스토리지 브라우저를 선택한다
테이블을 선택한다
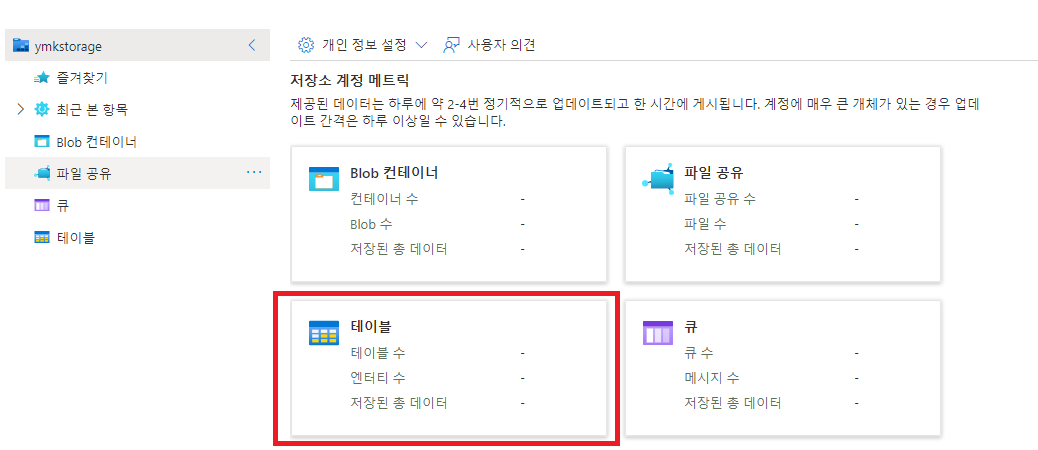
내가 확인 할 테이블을 선택한다
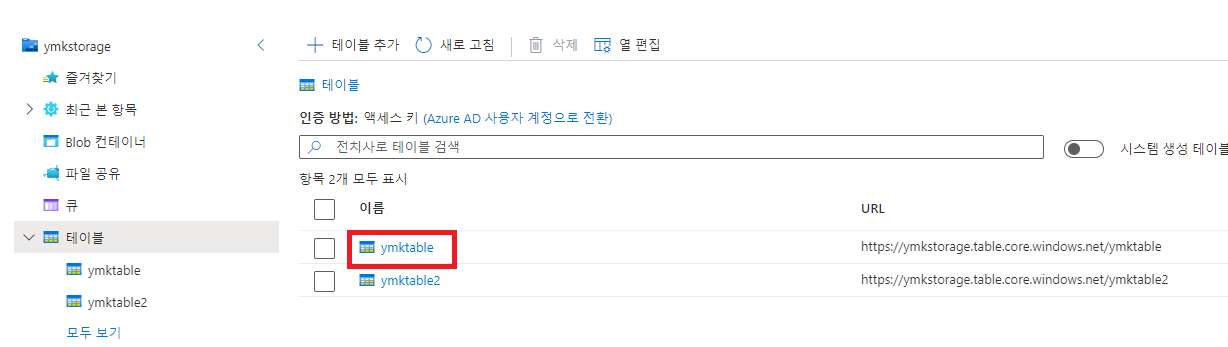
내가 입력한 데이터 확인이 가능하다.
마치며
만약 코드에 대한 내용을 보고 싶으면 아래 주소로 이동하여 커밋 기록을 참고 바란다.
https://github.com/ymkmoon/toyseven/commit/fd33235539b6de269e0bef91a00e07760b2bfd9e
댓글남기기